Spring Boot Admin是一个开源社区项目,用于管理和监控SpringBoot应用程序。每个应用都认为是一个客户端,通过 HTTP 或者使用 Eureka 注册到 admin server 中进行展示,通过Spring Boot Admin UI 将数据展示在前端, 实现可视化监控管理。提供如下功能:
- 显示健康状况
- 应用运行参数信息,例如:Java 系统属性、Java 环境变量属性、内存信息、Spring 环境属性
- 显示构建信息编号
- 关注并下载日志文件
- 查看jvm系统和环境属性
- 查看Spring Boot配置属性
- 支持Spring Cloud的postable / env-和/ refresh-endpoint
- 轻松的日志级管理
- 与JMX-beans交互
- 查看线程转储
- 查看http跟踪
- 查看auditevents
- 查看http-endpoints
- 查看计划任务
- 查看和删除活动会话(使用spring-session)
- 查看Flyway / Liquibase数据库迁移
- 下载heapdump
- 状态变更通知(通过电子邮件,Slack,Hipchat,......)
- 状态更改的事件日志(非持久性)
Spring Boot Admin Server 作为监控服务端, 要监控所有的客户端的运行状态, 实际是通过Actuator的/health监控节点来获取服务状态, 客户端和服务端都设置一个任务监听器,定时监听对方的心跳,并在服务器及时更新客户端状态。
2. 启动Admin-Server1、先把Spring Boot Admin Server 服务端启动, 新建Admin-Server工程: pom依赖, 这里采用的2.1.6版本:

POM依赖, 这里采用的2.1.6版本:
<dependencies>
    <!-- Spring boot web服务自动化配置 -->
    <dependency>
        <groupId>org.springframework.boot</groupId>
        <artifactId>spring-boot-starter-web</artifactId>
    </dependency>
    <!-- Spring boot 监控组件 -->
    <dependency>
        <groupId>org.springframework.boot</groupId>
        <artifactId>spring-boot-starter-actuator</artifactId>
    </dependency>
    <!-- Spring boot Admin 自动化配置组件 -->
    <dependency>
        <groupId>de.codecentric</groupId>
        <artifactId>spring-boot-admin-starter-server</artifactId>
        <version>2.1.6</version>
    </dependency>

</dependencies>
2、新建启动类:
com.mirson.boot.admin.server.AdminServerApplication
@SpringBootApplication
@EnableAdminServer
public class AdminServerApplication {

    public static void main(String[] args) {
        SpringApplication.run(AdminServerApplication.class, args);
    }
}
要开启@EnableAdminServer注解
3、配置文件
application.yml:
server:
  port: 8869
spring:
  application:
    name: admin-server
4、启动服务
访问端口8869, http://127.0.0.1:8869
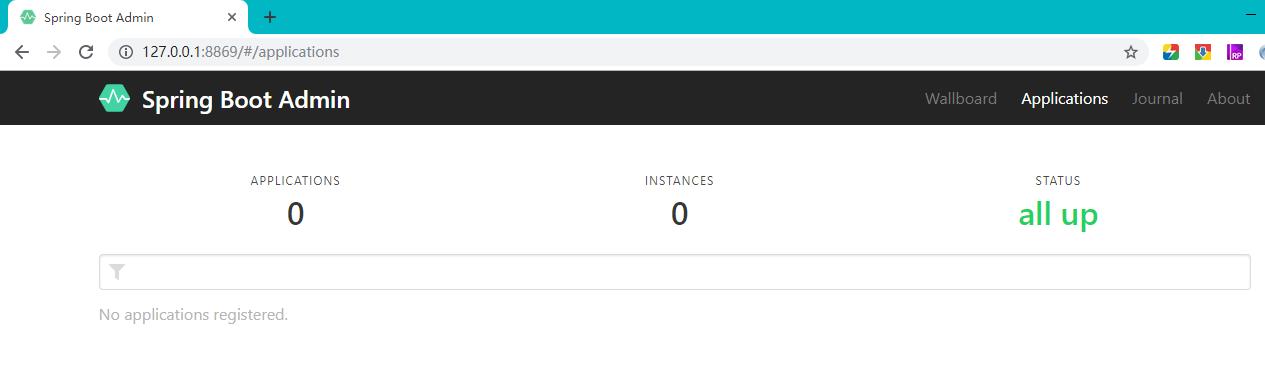
服务正常启动成功, 目前没有服务接入。
3. 客户端直连模式1、创建Admin-Client 工程 POM文件依赖:

POM文件依赖:
<dependencies>

    <!-- Spring boot 自动化配置 -->
    <dependency>
        <groupId>org.springframework.boot</groupId>
        <artifactId>spring-boot-starter-web</artifactId>
    </dependency>
    <!-- Spring boot 监控组件 -->
    <dependency>
        <groupId>org.springframework.boot</groupId>
        <artifactId>spring-boot-starter-actuator</artifactId>
    </dependency>
    <!-- Spring boot Admin 自动化配置组件 -->
    <dependency>
        <groupId>de.codecentric</groupId>
        <artifactId>spring-boot-admin-starter-client</artifactId>
        <version>2.1.6</version>
    </dependency>

</dependencies>
这里不同于服务端, 加上spring-boot-admin-starter-client客户端依赖,与服务端版本一致2.1.6。
2、启动类
com.mirson.boot.admin.client.AdminClientApplication
@SpringBootApplication
public class AdminClientApplication {

    public static void main(String[] args) {
        SpringApplication.run(AdminClientApplication.class, args);
    }
}
启动类不需要加入额外注解,编写一般的Spring Boot 应用程序即可。
3、配置文件
application.yml:
server:
  port: 8870
spring:
  application:
    name: admin-client
  boot:
    admin:
      client:
        url: http://127.0.0.1:8869
        instance:
          name: admin-client
          prefer-ip: true
management:
  endpoints:
    web:
      exposure:
        include: "*"
  endpoint:
    health:
      show-details: ALWAYS
    shutdown:
      enabled: true
- boo.admin.client.url 指定监控服务的地址与端口
- boo.admin.client.instance.name: 为监控客户端的显示名称, 可以自定义修改
- boo.admin.client.instance.prefer-ip: 为true代表采用IP进行显示。
- endpoints.web.exposure.include: “*”星号代表暴露所有监控节点,如果不想暴露所有,也可以指定哪些节点是可以暴露访问。
- endpoints.health.show-details: 显示health节点的详细信息。
- endpoint.shutdown.enabled: 允许通过监控节点对应用程序进行关闭
4、启动客户端服务
再次访问监控服务, 可以看到新加入的客户端服务:

在微服务应用中, 可以通过服务注册中心, 来实现Boot Admin的监控管理, 客户端不需要作任何配置,减少维护成本。这里以Nacos注册中心为例:
4.1. 服务端1、创建服务端admin-server-nacos工程

POM依赖:
 <dependencies>
        <!-- Spring boot 自动化配置 -->
        <dependency>
            <groupId>org.springframework.boot</groupId>
            <artifactId>spring-boot-starter-web</artifactId>
        </dependency>
        <!-- Spring boot 监控组件 -->
        <dependency>
            <groupId>org.springframework.boot</groupId>
            <artifactId>spring-boot-starter-actuator</artifactId>
        </dependency>
        <!-- Spring boot Admin 自动化配置组件 -->
        <dependency>
            <groupId>de.codecentric</groupId>
            <artifactId>spring-boot-admin-starter-server</artifactId>
            <version>2.1.6</version>
        </dependency>
        <!-- Nacos服务注册发现依赖 -->
        <dependency>
            <groupId>org.springframework.cloud</groupId>
            <artifactId>spring-cloud-starter-alibaba-nacos-discovery</artifactId>
        </dependency>
    </dependencies>
加入Nacos注册发现依赖组件。
2、启动类:
com.mirson.boot.admin.server.nacos.AdminServerNacosApplication
@SpringBootApplication
@EnableDiscoveryClient
@EnableAdminServer
public class AdminServerNacosApplication {

    public static void main(String[] args) {
        SpringApplication.run(AdminServerNacosApplication.class, args);
    }
}
要开启@EnableAdminServer注解。
3、配置文件
application.yml
server:
  port: 8869
spring:
  application:
    name: admin-server-nacos
  cloud:
    nacos:
      discovery:
        server-addr: 127.0.0.1:8848

management:
  endpoints:
    web:
      exposure:
        include: "*"
  endpoint:
    health:
      show-details: ALWAYS
配置服务注册中心信息, 这里也可以将自身服务纳入监控, 将监控节点暴露即可。
4、启动服务
先启动Nacos服务
启动admin-server-nacos服务, 访问地址: http://127.0.0.1:8869
可以看到自身服务已经加入监控中

1、新建客户端工程admin-client-nacos

MAVEN依赖:
<dependencies>
    <!-- Spring boot 自动化配置 -->
    <dependency>
        <groupId>org.springframework.boot</groupId>
        <artifactId>spring-boot-starter-web</artifactId>
    </dependency>
    <!-- Spring boot 监控组件 -->
    <dependency>
        <groupId>org.springframework.boot</groupId>
        <artifactId>spring-boot-starter-actuator</artifactId>
    </dependency>
    <!-- Nacos服务注册发现依赖 -->
    <dependency>
        <groupId>org.springframework.cloud</groupId>
        <artifactId>spring-cloud-starter-alibaba-nacos-discovery</artifactId>
    </dependency>

</dependencies>
客户端不需要像直连模式一样加入client组件, 监控服务端会自动从注册中心获取客户端的配置信息。
2、启动类
com.mirson.boot.admin.client.nacos.AdminClientNacosApplication
@SpringBootApplication
@EnableDiscoveryClient
public class AdminClientNacosApplication {

    public static void main(String[] args) {
        SpringApplication.run(AdminClientNacosApplication.class, args);
    }
}
3、配置文件
application.yml
server:
  port: 8870
spring:
  application:
    name: admin-client-nacos
  cloud:
    nacos:
      discovery:
        server-addr: 127.0.0.1:8848

management:
  endpoints:
    web:
      exposure:
        include: "*"
  endpoint:
    health:
      show-details: ALWAYS
配置与直连模式一样, 需要暴露监控节点, 这样监控服务端才能正常获取状态信息。
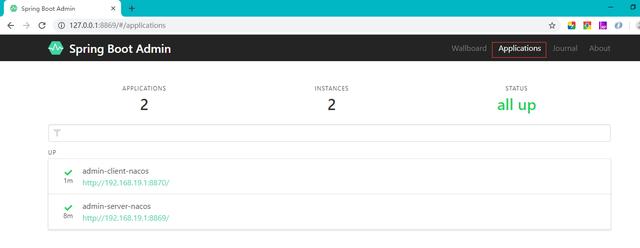
4、启动服务
访问服务端, 可以看到客户端节点也已经加入到监控后台:

监控服务端直接暴露访问存在安全隐患, 集成Spring Security权限控制组件, 增加登陆鉴权功能。
1、增加MAVEN依赖
pom.xml文件, 增加:
<!--Spring  Security 鉴权组件-->
<dependency>
    <groupId>org.springframework.boot</groupId>
    <artifactId>spring-boot-starter-security</artifactId>
</dependency>
2、创建配置类:
com.mirson.boot.admin.server.nacos.SecuritySecureConfig
@configuration
public class SecuritySecureConfig extends WebSecurityConfigurerAdapter {

    private final String adminContextPath;

    public SecuritySecureConfig(AdminServerProperties adminServerProperties) {
        this.adminContextPath = adminServerProperties.getContextPath();
    }

    @Override
    protected void configure(HttpSecurity http) throws Exception {
        SavedRequestAwareAuthenticationSuccessHandler successHandler = new SavedRequestAwareAuthenticationSuccessHandler();
        successHandler.setTargetUrlParameter("redirectTo");
        successHandler.setDefaultTargetUrl(adminContextPath   "/");

        http.authorizeRequests()
                //授予对所有静态资产和登录页面的公共访问权限
                .antMatchers(adminContextPath   "/assets/**").permitAll()
                .antMatchers(adminContextPath   "/login").permitAll()
                //必须对每个其他请求进行身份验证
                .anyRequest().authenticated()
                .and()
                //配置登录和注销
                .formLogin().loginPage(adminContextPath   "/login").successHandler(successHandler).and()
                .logout().logoutUrl(adminContextPath   "/logout").and()
                //启用HTTP-Basic支持。这是Spring Boot Admin Client注册所必需的
                .httpBasic().and();
    }
}
3、配置文件
application.yml
server:
  port: 8869
spring:
  application:
    name: admin-server-nacos
  cloud:
    nacos:
      discovery:
        server-addr: 127.0.0.1:8848
        metadata:
          user.name: ${spring.security.user.name}
          user.password: ${spring.security.user.password}
      config:
        server-addr: 127.0.0.1:8848
  security:
    user:
      name: "admin"
      password: "admin"
management:
  endpoints:
    web:
      exposure:
        include: "*"
  endpoint:
    health:
      show-details: ALWAYS
- spring.srcurity.user.name: 增加用户名与密码
- nacos.metadata.user.name: 注册中心也需加上用户名与密码, 元数据方式记录。 因为监控服务受Spring Security权限控制,在注册中心提供用户密码信息, 监控服务就能正常访问自身监控状态信息。
4、启动服务
访问会要求先进行登陆

显示所有监控服务及状态
事件收集器, 显示注册, 状态, 节点检测等信息。

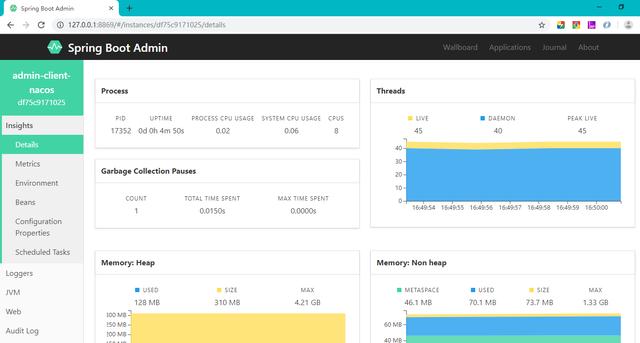
显示服务的详细运行情况, 包含元数据, 磁盘信息, 处理器、线程与内存等信息。
显示各种度量指标信息, 如http、jvm、tomcat容器等。

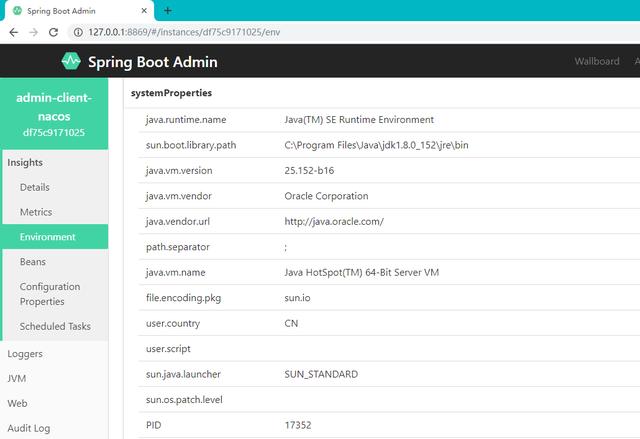
显示系统、JVM、环境变量等配置信息
显示应用程序的线程信息, 不同颜色代表程序的运行状态, 点击线程可以查看具体信息。

监控管理后台功能较为丰富, 其他功能大家可自行探索, 不再赘述。
7. 小结这里讲解了Spring Boot Admin直连模式与注册中心模式的使用, 在生产环境中一般采用注册中心模式, 可以自己再尝试扩展其他注册中心的接入。实际生产当中, 是要有严格的权限控制, 掌握Spring-Security的集成, 也可以参阅资料,拓展与OAUTH2的集成。
,