- 金融领域。人脸识别当前在金融领域的应用最为广泛,当前国内金融领域监管要求严格,金融相关产品都需要实名认证,并且具有较高的安全性要求,活体识别,银行卡ocr识别,身份证ocr识别,人证对比等在各大手机银行,金融app,保险app等都已经成为不可或缺的一个环节
- 安保领域。目前大量的企业,住宅,社区,学校等安全管理越来越普及,人脸门禁系统已经成为非常普及的一种安保方式。
- 通行领域。很多城市的火车站已经安装了人脸识别通行设备,进行人证对比过检,有些城市的地铁站也可以通过人脸识别的方式进行地铁进出站通行。
- 泛娱乐领域。现在市场上火爆的美颜相机,网络直播,短视频等都是建立在人脸识别的基础上对人脸进行美颜和特效处理。
- 公安,司法领域。公安系统在追捕逃犯时也会利用人脸识别系统对逃犯进行定位,监狱系统目前也会对服刑人员通过人脸识别系统进行报警和安防
- 自助服务设备。如银行的自动提款机,无人超市等。
- 考勤及会务。如工作考勤,会议出席人脸墙等。目前人脸识别市场上的巨头主要有商场,也有很多领域内巨头公司投资的小公司。
dlib模块安装其实是比较繁琐的,要认真耐心点,可以参考:dlib安装,如果不行再看看别的教程。
import sys
import cv2
import face_recognition #dlib 人脸识别库
测试图片为我的偶像:

face_img=face_recognition.load_image_file('1.png')
print(face_img)
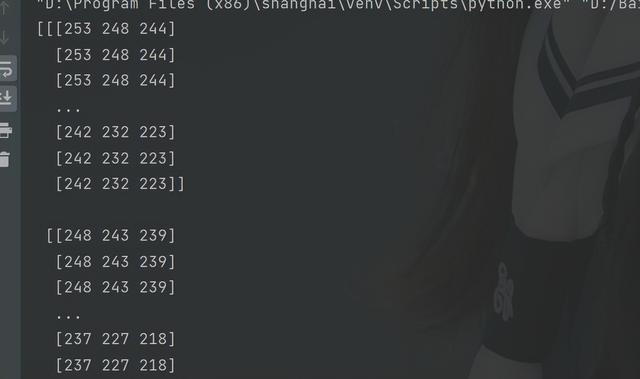
打印结果:

输出为三维图像矩阵,把图像转为矩阵。
第三步:获取图片中的人脸数据提取人脸特征编码,并获取到人脸五官的位置:
face_encodings=face_recognition.face_encodings(face_img)#进行特征提取向量化,获取人脸的编码
face_locations=face_recognition.face_locations(face_img)#五官对应的位置
print(face_encodings)
图片中有几个人脸就有几个数组:

这里只做判断两个人是否为一个人,超出两个就退出了
n=len(face_encodings)
print(n)
#这里只做判断两个人是否为一个人,超出两个就退出了
if n>2:
print('超过两个人')
sys.exit()
打印可以分出是两个人:

#获取两个人的数据
face1=face_encodings[0]
face2=face_encodings[1]
result=face_recognition.compare_faces([face1],face2,tolerance=0.6)#人脸比较,,误差不超过0.6则可以,默认值也为0.6
print(result)
返回:

判断出为不是同一个人。
再稍微修改一下,让表达更清楚:
if result==[True]:
name='same'
print('两个人为同一个人')
else:
print('两者不是同一个人')
name='different'
返回:

获取两个人脸位置坐标:
for i in range(len(face_encodings)):
face_encoding=face_encodings[(i-1)] #倒序获取
face_location = face_locations[(i - 1)]
print(face_location)#获取人脸位置
返回:

元祖四个数值分别表示框人脸矩形框的四个点坐标。
获取到坐标后开始画框框并写上文字:
top,right,bottom,left=face_location#确定出坐标
#画框框
cv2.rectangle(face_img,(left,top),(right,bottom),(255,0,0))#传参分别为:图片,坐标,RGB颜色,框粗细
#写字上去
cv2.putText(face_img,name,(left-10,top-10),cv2.FONT_HERSHEY_DUPLEX,0.8,(255,255,0),2)#传参数分别为:图片,文字,坐标,字体,字体大小,颜色,粗细
face_img_rgb=cv2.cvtColor(face_img,cv2.COLOR_BGR2RGB)#确保颜色不要混乱
#展示图像
cv2.imshow('compare',face_img_rgb)
#设置等待关闭
cv2.waitKey(0)
效果:

你只需要按步骤敲代码即可为全部代码,当然为了便于大家直接cv,代码展示如下:
# coding=gbk
"""
import sys
import cv2
import face_recognition #dlib 人脸识别库
face_img=face_recognition.load_image_file('1.png')
# print(face_img)
face_encodings=face_recognition.face_encodings(face_img)#进行特征提取向量化,获取人脸的编码
face_locations=face_recognition.face_locations(face_img)#五官对应的位置
# print(face_encodings)
n=len(face_encodings)
print(n)
#这里只做判断两个人是否为一个人,超出两个就退出了
if n>2:
print('超过两个人')
sys.exit()
#获取两个人的数据
face1=face_encodings[0]
face2=face_encodings[1]
result=face_recognition.compare_faces([face1],face2,tolerance=0.6)#人脸比较,,误差不超过0.6则可以,默认值也为0.6
# print(result)
if result==[True]:
name='same'
print('两个人为同一个人')
else:
print('两者不是同一个人')
name='different'
for i in range(len(face_encodings)):
face_encoding=face_encodings[(i-1)] #倒序获取
face_location = face_locations[(i - 1)]
# print(face_location)#获取人脸位置
top,right,bottom,left=face_location#确定出坐标
#画框框
cv2.rectangle(face_img,(left,top),(right,bottom),(255,0,0))#传参分别为:图片,坐标,RGB颜色,框粗细
#写字上去
cv2.putText(face_img,name,(left-10,top-10),cv2.FONT_HERSHEY_DUPLEX,0.8,(255,255,0),2)#传参数分别为:图片,文字,坐标,字体,字体大小,颜色,粗细
face_img_rgb=cv2.cvtColor(face_img,cv2.COLOR_BGR2RGB)#确保颜色不要混乱
#展示图像
cv2.imshow('compare',face_img_rgb)
#设置等待关闭
cv2.waitKey(0)
标出了两个人脸并写上为different,就是不同的意思,当然本篇文章为了给大家简单介绍实现人脸识别,并没有做过多的复杂实现,近段时间我研究人脸识别也做了一些复杂的功能实现,感兴趣也可以一起聊聊。
,


