实验环境必须保证每个节点有解析:
本实验环境基于上一篇:https://blog.csdn.net/aaaaaab_/article/details/82055648 redhat 6.5 server1 172.25.254.1 mfsmaster节点 server2 172.25.254.2 从节点,就是真正储存数据的节点 server3 172.25.254.3 通server2 server4 172.25.254.4 高可用节点 真机: 172.25.254.84 client 1 2 3 4 5 6 7
高可用的搭建:
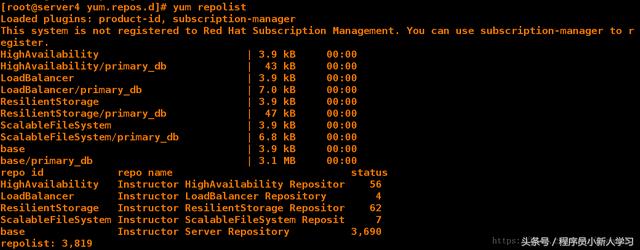
在server1配置高可用yum源:
[root@server1 ~]# cd /etc/yum.repos.d/ [root@server1 yum.repos.d]# vim dvd.repo [root@server1 yum.repos.d]# yum clean all [root@server1 yum.repos.d]# yum repolist [root@server1 yum.repos.d]# cat dvd.repo # repos on instructor for classroom use # Main rhel6.5 server [base] name=Instructor Server Repository baseurl=http://172.25.38.250/source6.5 gpgcheck=1 gpgkey=file:///etc/pki/rpm-gpg/RPM-GPG-KEY-redhat-release # HighAvailability rhel6.5 [HighAvailability] name=Instructor HighAvailability Repository baseurl=http://172.25.38.250/source6.5/HighAvailability gpgcheck=1 gpgkey=file:///etc/pki/rpm-gpg/RPM-GPG-KEY-redhat-release # LoadBalancer packages [LoadBalancer] name=Instructor LoadBalancer Repository baseurl=http://172.25.38.250/source6.5/LoadBalancer gpgcheck=1 gpgkey=file:///etc/pki/rpm-gpg/RPM-GPG-KEY-redhat-release # ResilientStorage [ResilientStorage] name=Instructor ResilientStorage Repository baseurl=http://172.25.38.250/source6.5/ResilientStorage gpgcheck=1 gpgkey=file:///etc/pki/rpm-gpg/RPM-GPG-KEY-redhat-release # ScalableFileSystem [ScalableFileSystem] name=Instructor ScalableFileSystem Repository baseurl=http://172.25.38.250/source6.5/ScalableFileSystem gpgcheck=1 gpgkey=file:///etc/pki/rpm-gpg/RPM-GPG-KEY-redhat-release [root@server1 yum.repos.d]# scp dvd.repo server4:/etc/yum.repos.d/ 传递到server4 1 2 3 4 5 6 7 8 9 10 11 12 13 14 15 16 17 18 19 20 21 22 23 24 25 26 27 28 29 30 31 32 33 34 35 36 37 38 39 40 41 42

在server4配置yum源:
[root@server4 ~]# cd /etc/yum.repos.d/ [root@server4 yum.repos.d]# ls dvd.repo rhel-source.repo [root@server4 yum.repos.d]# rm -fr rhel-source.repo [root@server4 yum.repos.d]# ls dvd.repo [root@server4 yum.repos.d]# yum clean all [root@server4 yum.repos.d]# yum repolist 1 2 3 4 5 6 7 8
在serevr1和server4安装组件:
yum install -y pacemaker corosync 配置完了yum源可以安装 yum install crmsh-1.2.6-0.rc2.2.1.x86_64.rpm pssh-2.3.1-2.1.x86_64.rpm 需要自己下载软件包 1 2 3
配置server1的高可用集群:
[root@server1 ~]# cd /etc/corosync/ [root@server1 corosync]# ls corosync.conf.example service.d corosync.conf.example.udpu uidgid.d [root@server1 corosync]# cp corosync.conf.example corosync.conf [root@server1 corosync]# vim corosync.conf [root@server1 corosync]# cat corosync.conf # Please read the corosync.conf.5 manual page compatibility: whitetank totem { version: 2 secauth: off threads: 0 interface { ringnumber: 0 bindnetaddr: 172.25.38.0 mcastaddr: 226.94.1.1 多波地址 mcastport: 7654 多波端口保证不同 ttl: 1 } } logging { fileline: off to_stderr: no to_logfile: yes to_syslog: yes logfile: /var/log/cluster/corosync.log debug: off timestamp: on logger_subsys { subsys: AMF debug: off } } amf { mode: disabled } amf { mode: disabled } service { name: pacemaker ver: 0 } [root@server1 corosync]# /etc/init.d/corosync start 开启服务 Starting Corosync Cluster Engine (corosync): [ OK ] [root@server1 corosync]# scp corosync.conf server4:/etc/corosync/ root@server4's password: corosync.conf 100% 508 0.5KB/s 00:00 1 2 3 4 5 6 7 8 9 10 11 12 13 14 15 16 17 18 19 20 21 22 23 24 25 26 27 28 29 30 31 32 33 34 35 36 37 38 39 40 41 42 43 44 45 46 47 48 49 50 51 52 53 54

在server4可以直接打开服务因为配置文件已经配置完成:
[root@server4 ~]# [root@server4 ~]# cd /etc/corosync/ [root@server4 corosync]# ls corosync.conf corosync.conf.example.udpu uidgid.d corosync.conf.example service.d [root@server4 corosync]# /etc/init.d/corosync start Starting Corosync Cluster Engine (corosync): [ OK ] 1 2 3 4 5 6 7

在server1打开crm_mon可以看到监控信息:

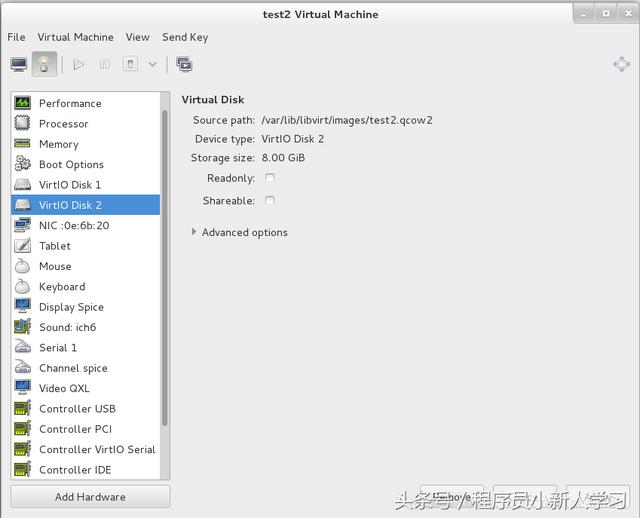
将server2作为存储添加一块8G磁盘:

[root@server2 mfs]# yum install -y scsi-* [root@server2 ~]# vim /etc/tgt/targets.conf <target iqn.2018-08.com.example:server.target1> backing-store /dev/vdb </target> [root@server2 ~]# /etc/init.d/tgtd start Starting SCSI target daemon: [ OK ] 1 2 3 4 5 6 7

在server1和server4安装iscsi
[root@server1 corosync]# yum install -y iscsi-* 1
在server1:
[root@server1 corosync]# iscsiadm -m discovery -t st -p 172.25.38.2 [root@server1 corosync]# iscsiadm -m node -l [root@server1 corosync]# fdisk -l Disk /dev/sda: 8589 MB, 8589934592 bytes 64 heads, 32 sectors/track, 8192 cylinders Units = cylinders of 2048 * 512 = 1048576 bytes Sector size (logical/physical): 512 bytes / 512 bytes I/O size (minimum/optimal): 512 bytes / 512 bytes Disk identifier: 0x00000000 1 2 3 4 5 6 7 8 9 10
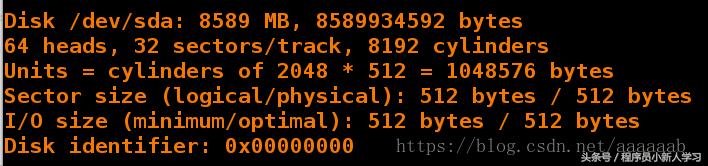
[root@server1 corosync]# fdisk -cu /dev/sda 创建分区 n-->p--->1--->p--->wq 1 2
[root@server1 corosync]# mkfs.ext4 /dev/sda1 格式化 1

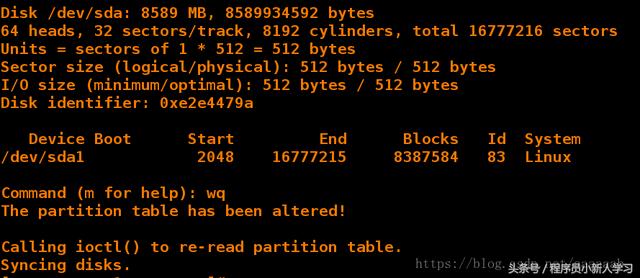
在server4配置:
[root@server4 corosync]# iscsiadm -m discovery -t st -p 172.25.38.2 [root@server4 corosync]# iscsiadm -m node -l [root@server4 corosync]# fdisk -l Disk /dev/sda: 8589 MB, 8589934592 bytes 64 heads, 32 sectors/track, 8192 cylinders Units = cylinders of 2048 * 512 = 1048576 bytes Sector size (logical/physical): 512 bytes / 512 bytes I/O size (minimum/optimal): 512 bytes / 512 bytes Disk identifier: 0xe2e4479a Device Boot Start End Blocks Id System /dev/sda1 2 8192 8387584 83 Linux 1 2 3 4 5 6 7 8 9 10 11 12 13

配置server1的master端:
[root@server1 corosync]# /etc/init.d/moosefs-master status 查看状态 [root@server1 corosync]# /etc/init.d/moosefs-master stop 停止master服务 Stopping mfsmaster: [ OK ] [root@server1 corosync]# cd /var/lib/mfs/ [root@server1 mfs]# ls changelog.3.mfs changelog.6.mfs metadata.mfs.empty changelog.4.mfs metadata.mfs stats.mfs changelog.5.mfs metadata.mfs.back.1 [root@server1 mfs]# pwd /var/lib/mfs [root@server1 mfs]# mount /dev/sda1 /mnt/ 挂载 [root@server1 mfs]# ls changelog.3.mfs changelog.6.mfs metadata.mfs.empty changelog.4.mfs metadata.mfs stats.mfs changelog.5.mfs metadata.mfs.back.1 [root@server1 mfs]# cp -p * /mnt/ [root@server1 mfs]# cd /mnt/ [root@server1 mnt]# ls changelog.3.mfs changelog.6.mfs metadata.mfs.back.1 changelog.4.mfs lost found metadata.mfs.empty changelog.5.mfs metadata.mfs stats.mfs [root@server1 mnt]# cd 1 2 3 4 5 6 7 8 9 10 11 12 13 14 15 16 17 18 19 20 21 22

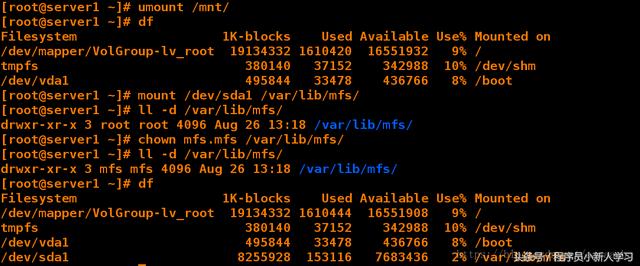
[root@server1 ~]# umount /mnt/ [root@server1 ~]# df Filesystem 1K-blocks Used Available Use% Mounted on /dev/mapper/VolGroup-lv_root 19134332 1610420 16551932 9% / tmpfs 380140 37152 342988 10% /dev/shm /dev/vda1 495844 33478 436766 8% /boot [root@server1 ~]# mount /dev/sda1 /var/lib/mfs/ 挂载 [root@server1 ~]# ll -d /var/lib/mfs/ drwxr-xr-x 3 root root 4096 Aug 26 13:18 /var/lib/mfs/ [root@server1 ~]# chown mfs.mfs /var/lib/mfs/ 更改用户和组,添加权限 [root@server1 ~]# ll -d /var/lib/mfs/ drwxr-xr-x 3 mfs mfs 4096 Aug 26 13:18 /var/lib/mfs/ [root@server1 ~]# df Filesystem 1K-blocks Used Available Use% Mounted on /dev/mapper/VolGroup-lv_root 19134332 1610444 16551908 9% / tmpfs 380140 37152 342988 10% /dev/shm /dev/vda1 495844 33478 436766 8% /boot /dev/sda1 8255928 153116 7683436 2% /var/lib/mfs 1 2 3 4 5 6 7 8 9 10 11 12 13 14 15 16 17 18
配置server4作为master端,同样作为高可用节点:
[root@server4 ~]# ls crmsh-1.2.6-0.rc2.2.1.x86_64.rpm moosefs-master-3.0.97-1.rhsysv.x86_64.rpm pssh-2.3.1-2.1.x86_64.rpm [root@server4 ~]# yum install moosefs-master-3.0.97-1.rhsysv.x86_64.rpm 1 2 3 4 5

在server2和server3关闭chunkserver:
/etc/init.d/moosefs-chunkserver stop 1
配置server1使得直接通过kill的方式对服务依旧没有影响可以高可用:
[root@server1 ~]# /etc/init.d/moosefs-master start 开启服务 Starting mfsmaster: [ OK ] [root@server1 ~]# ps ax 查看进程 1595 ? S 0:00 [flush-8:0] 1602 ? S< 0:01 mfsmaster start 1604 pts/0 R 0:00 ps ax [root@server1 ~]# kill -9 1602 直接结束进程 [root@server1 ~]# cd /var/lib/mfs/ [root@server1 mfs]# ls changelog.0.mfs changelog.5.mfs metadata.mfs.back stats.mfs changelog.3.mfs changelog.6.mfs metadata.mfs.back.1 changelog.4.mfs lost found metadata.mfs.empty [root@server1 mfs]# /etc/init.d/moosefs-master start 直接kill的方式会导致开启服务会失败 Starting mfsmaster: [FAILED] 1 2 3 4 5 6 7 8 9 10 11 12 13 14

[root@server1 mfs]# mfsmetarestore mfsmetarestore has been removed in version 1.7, use mfsmaster -a instead [root@server1 mfs]# mfsmaster -a 恢复服务master [root@server1 mfs]# ps ax 查看进程已经恢复 1 2 3 4

[root@server1 mfs]# ls changelog.0.mfs changelog.5.mfs metadata.mfs.back stats.mfs changelog.3.mfs changelog.6.mfs metadata.mfs.back.1 changelog.4.mfs lost found metadata.mfs.empty [root@server1 mfs]# mfsmaster stop 再次关闭服务 sending SIGTERM to lock owner (pid:1616) waiting for termination terminated [root@server1 mfs]# vim /etc/init.d/moosefs-master 将恢复方式写入脚本 start () { echo -n $"Starting $prog: " $prog start >/dev/null 2>&1 || $prog -a >/dev/null 2>&1 && success || failure RETVAL=$? echo [ $RETVAL -eq 0 ] && touch /var/lock/subsys/$prog return $RETVAL } [root@server1 mfs]# /etc/init.d/moosefs-master start 可以打开服务 Starting mfsmaster: [ OK ] 1 2 3 4 5 6 7 8 9 10 11 12 13 14 15 16 17 18

验证脚本的作用是否可以恢复被kill掉的环境:
[root@server1 mfs]# ps ax 查看进程 1594 ? S 0:00 [ext4-dio-unwrit] 1595 ? S 0:00 [flush-8:0] 1626 ? S< 0:01 mfsmaster start 1628 pts/0 R 0:00 ps ax [root@server1 mfs]# kill -9 1626 结束master进程 [root@server1 mfs]# ls changelog.1.mfs changelog.6.mfs metadata.mfs.back stats.mfs changelog.4.mfs changelog.7.mfs metadata.mfs.back.1 changelog.5.mfs lost found metadata.mfs.empty [root@server1 mfs]# /etc/init.d/moosefs-master start 可以正常开启服务 Starting mfsmaster: [ OK ] 1 2 3 4 5 6 7 8 9 10 11 12

同样搭建另外一个高可用节点server4:
[root@server4 ~]# vim /etc/init.d/moosefs-master start () { echo -n $"Starting $prog: " $prog start >/dev/null 2>&1 || $prog -a >/dev/null 2>&1 && success || failure RETVAL=$? echo [ $RETVAL -eq 0 ] && touch /var/lock/subsys/$prog return $RETVAL } 1 2 3 4 5 6 7 8 9

在server1配置策略:
[root@server1 mfs]# /etc/init.d/moosefs-master stop Stopping mfsmaster: [ OK ] [root@server1 mfs]# crm crm(live)# configure crm(live)configure# show node server1 node server4 property $id="cib-bootstrap-options" \ dc-version="1.1.10-14.el6-368c726" \ cluster-infrastructure="classic openais (with plugin)" \ expected-quorum-votes="2" crm(live)configure# property no-quorum-policy=ignore crm(live)configure# commit crm(live)configure# property stonith-enabled=true crm(live)configure# show node server1 node server4 property $id="cib-bootstrap-options" \ dc-version="1.1.10-14.el6-368c726" \ cluster-infrastructure="classic openais (with plugin)" \ expected-quorum-votes="2" \ no-quorum-policy="ignore" \ stonith-enabled="true" crm(live)configure# commie ERROR: syntax: commie crm(live)configure# commit crm(live)configure# bye bye 1 2 3 4 5 6 7 8 9 10 11 12 13 14 15 16 17 18 19 20 21 22 23 24 25 26 27 28

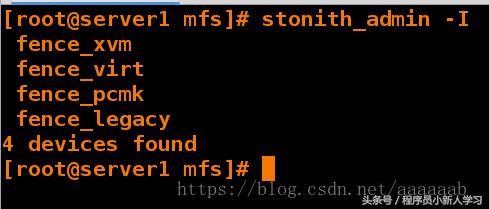
[root@server1 mfs]# stonith_admin -I fence_pcmk fence_legacy 2 devices found [root@server1 mfs]# yum install -y fence-virt [root@server1 mfs]# stonith_admin -I fence_xvm fence_virt fence_pcmk fence_legacy 4 devices found 1 2 3 4 5 6 7 8 9 10 11
在server4配置fence节点:
[root@server4 ~]# yum install fence-virt -y Loaded plugins: product-id, subscription-manager This system is not registered to Red Hat Subscription Management. You can use subscription-manager to register. Setting up Install Process Package fence-virt-0.2.3-15.el6.x86_64 already installed and latest version Nothing to do [root@server4 ~]# stonith_admin -I fence_xvm fence_virt fence_pcmk fence_legacy 4 devices found [root@server4 ~]# stonith_admin -M -a fence_xvm 1 2 3 4 5 6 7 8 9 10 11 12 13

在真机将fence_kvm.key传输到master节点:
[root@foundation38 images]# systemctl start fence_virtd.service 开启服务 [root@foundation38 images]# systemctl status fence_virtd.service 查看服务状态打开即可 ● fence_virtd.service - Fence-Virt system host daemon Loaded: loaded (/usr/lib/systemd/system/fence_virtd.service; disabled; vendor preset: disabled) Active: active (running) since Sun 2018-08-26 13:58:55 CST; 2s ago 1 2 3 4 5

[root@foundation38 images]# netstat -anulp | grep :1229 默认断口1229开启 udp 0 0 0.0.0.0:1229 0.0.0.0:* 14972/fence_virtd [root@foundation38 images]# cd /etc/cluster/ [root@foundation38 cluster]# ls fence_xvm.key [root@foundation38 cluster]# scp fence_xvm.key root@172.25.38.1:/etc/cluster/ root@172.25.38.1's password: fence_xvm.key 100% 128 0.1KB/s 00:00 [root@foundation38 cluster]# scp fence_xvm.key root@172.25.38.4:/etc/cluster/ root@172.25.38.4's password: fence_xvm.key 100% 128 0.1KB/s 00:00 1 2 3 4 5 6 7 8 9 10 11

在server1和server4查看:


在真机查看一一映射关系:
[root@foundation38 cluster]# virsh list Id Name State ---------------------------------------------------- 4 test1 running 5 test2 running 6 test3 running 8 test4 running 1 2 3 4 5 6 7

在server1继续配置策略:
[root@server1 cluster]# crm crm(live)# configure crm(live)configure# primitive vmfence stonith:fence_xvm params pcmk_host_map="server1:test1;server4:test4" op monitor interval=1min crm(live)configure# commit 1 2 3 4
在server4输入crm_mon打开监控查看:

crm(live)configure# primitive vip ocf:heartbeat:IPaddr2 params ip= ip* (string): IPv4 or IPv6 address The IPv4 (dotted quad notation) or IPv6 address (colon hexadecimal notation) example IPv4 "192.168.1.1". example IPv6 "2001:db8:DC28:0:0:FC57:D4C8:1FFF". crm(live)configure# primitive vip ocf:heartbeat:IPaddr2 params ip=172.25.38.100 cidr_netmask=32 op monitor interval=30s crm(live)configure# commit 1 2 3 4 5 6 7 8

crm(live)configure# primitive mfsdata ocf:heartbeat:Filesystem params device=/dev/sda1 directory=/var/lib/mfs fstype=ext4 op monitor interval=1min crm(live)configure# primitive mfsmaster lsb:moosefs-master op monitor interval=30s 1 2

合并为一个组:
crm(live)configure# group mfsgroup vip mfsdata mfsmaster crm(live)configure# commit WARNING: mfsdata: default timeout 20s for start is smaller than the advised 60 WARNING: mfsdata: default timeout 20s for stop is smaller than the advised 60 WARNING: mfsdata: default timeout 20s for monitor is smaller than the advised 40 1 2 3 4 5
配置server4让节点主动上线,由于fence的机制会使得server4掉电重启:
[root@server4 ~]# /etc/init.d/corosync start Starting Corosync Cluster Engine (corosync): [ OK ] [root@server4 ~]# crm node online 1 2 3

在每个节点加入虚拟IP的解析:
172.25.38.100 mfsmaster 1
在server2和server3打开服务:
/etc/init.d/moosefs-chunkserver start 1
server1接管虚拟IP达成高可用:
[root@server1 cluster]# ip addr 1: lo: <LOOPBACK,UP,LOWER_UP> mtu 16436 qdisc noqueue state UNKNOWN link/loopback 00:00:00:00:00:00 brd 00:00:00:00:00:00 inet 127.0.0.1/8 scope host lo inet6 ::1/128 scope host valid_lft forever preferred_lft forever 2: eth0: <BROADCAST,MULTICAST,UP,LOWER_UP> mtu 1500 qdisc pfifo_fast state UP qlen 1000 link/ether 52:54:00:40:b9:87 brd ff:ff:ff:ff:ff:ff inet 172.25.38.1/24 brd 172.25.38.255 scope global eth0 inet 172.25.38.100/32 brd 172.25.38.255 scope global eth0 inet6 fe80::5054:ff:fe40:b987/64 scope link valid_lft forever preferred_lft forever
,