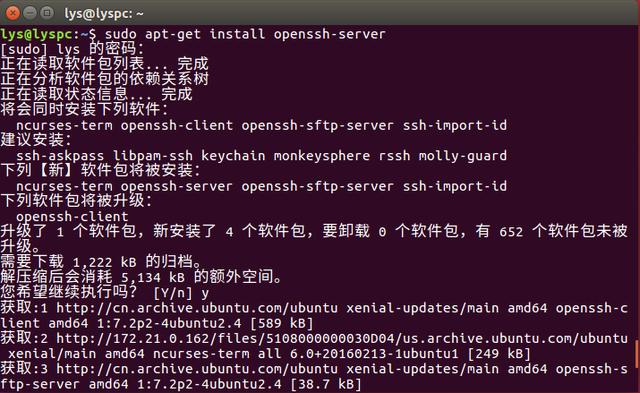
安装ssh链接工具
更新系统,以ubuntu为例
sudo apt update sudo apt upgrade
Debian / Ubuntu:
sudo apt-get install python-pip pip install git https://github.com/shado%去掉%wsocks/shado%去掉%wsocks.git@master
CentOS:
yum install python-setuptools && easy_install pip
pip install git https://github.com/shado%去掉%wsocks/shado%去掉%wsocks.git@master
生成配置文件
{ "server":"0.0.0.0", "server_port":443, "local_address": "0.0.0.0", "local_port":1080, "password":"1234567890", "timeout":300, "method":"aes-256-cfb", "fast_open": false }
server和local_address填写你服务器的IP,(aws填写私有IP)
后台运行
nohup ssserver -c /etc/shado%去掉%wsocks.json &
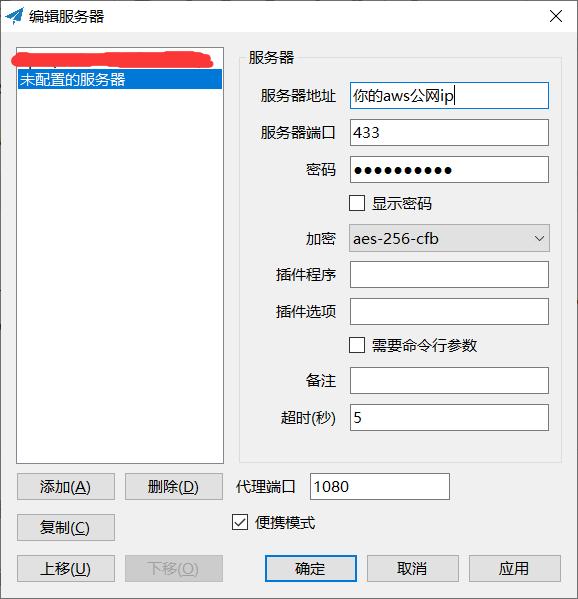
下载ssh连接工具 https://github.com/shadow%去掉%socks/shado%去掉%wsocks-windows,

点击确定,右键工具图标,启用系统代理
完成以上,打开https://github.com/FelisCatus/SwitchyOmega/releases,页面滚动到下方,找到SwitchyOmega_Chromium.crx,点击链接下载crx文件
在chrome浏览器的地址栏输入chrome://extensions/,然后回车,打开扩展程序页面。在这里,无法直接将刚才下载好的crx文件拖进来,需要做一些处理。
将刚才下载好的crx文件的扩展名改为zip,用解压缩软件解压到目录中。
在扩展程序页面中,找到右上角的开发者模式,将开发者模式打开。
在左上角会出现三个按钮,点击“加载已解压的扩展程序”铵钮,打开文件选择窗口,选择刚才解压的目录,然后点击“选择文件夹”按钮。
安装完后

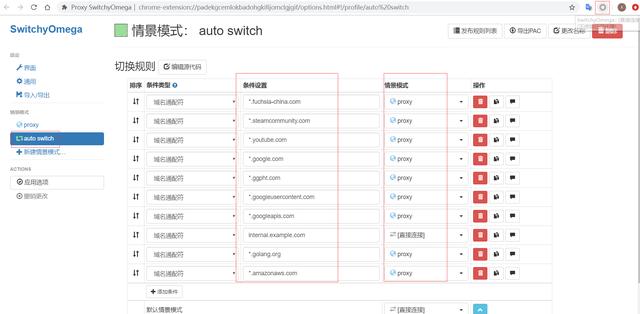
配置选项


